Vinyl fans spend a lot of time lusting after the perfect record collection – floor to ceiling, dotted with first pressings, valuable vinyl records and boutique oddities. It’s safe to say that the same passion and focus isn’t reserved for the maintenance of vinyl once it’s safely slotted onto our shelves at home, or regularly spun on a record player.
In order to help you learn how to care for your vinyl records, including how to clean your vinyl properly, we recently spoke to experts at Leeds-based Norman Records, who have offered up some tips on how to clean your vinyl records so that they kick out the jams for years to come. “Who knows, maybe your grandchildren, years from now, will be able to experience the same musical joy as you do from your collection today,” say Norman Records.
- Want some new wax? Explore the best Black Friday vinyl deals
- Wax on with the world’s best turntables...
- ...and the best budget turntables
- Or listen wirelessly with these 6 slick Bluetooth turntables

How to clean vinyl records
It might sound simple, but you should clean your records regularly to keep them sounding as good as they should for as long as possible. Why? Because vinyl records are prone to collecting everything from grease and dust to skin cells.
If you’re cash-rich yet time-poor, you could invest in a record cleaning machine to do all the work for you. If not, learning how to clean vinyl records at home is a good way to future-proof your collection of LP records, and it’s relatively easy and inexpensive to do too. Here’s a step-by-step guide to get you started:
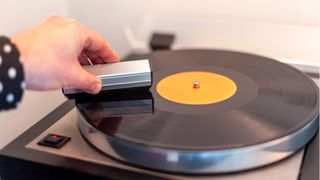
1. Pick up an anti-static record brush, such as the AudioQuest Vinyl Record Brush (see below) or the Pro-Ject Brush IT (also below), and use the record brush each time you play a record. Clean in the direction of the grooves, not across them, and avoid pushing down or applying pressure on the record itself.
2. Use a lightweight, anti-scratch microfibre cloth to gently clear away any dust or gunge, and to remove any unwanted oils from where your fingers may have touched the record when taking it in and out of the sleeve.
3. If the record has a build-up of dirt and gunk that isn’t shifting, it’s time to carry out a deep clean. For this we’d recommend buying a vinyl cleaning solution, such as VinylClear (see below), or one from Spincare, that has been formulated specifically for the task.
4. To spot clean any problem areas, lie your vinyl record on a flat, clean, stable and non-abrasive surface. Take your microfibre towel and dab the solution onto the vinyl record. Clean with circular movements and be gentle, making sure not to touch the label in the middle of the record.
5. Rinse, dry (in the air, or with a clean microfibre cloth) and give the record one last sweep with your anti-static record brush before returning the record, safely stored in its protective sleeve again, back to the shelf or wherever you keep your vinyl stash.
6. Never blow on a vinyl record! “Those microscopic specks of saliva may not seem a big deal at the time, but once your record is back in its sleeve and safely on a shelf it may never see the light of day again for years,” add the folks at Norman. “The combination of slobber and time can cause mould.”
- Learn how to buy your first vinyl record player
- Listen privately with the best headphones for vinyl

How to remove vinyl scratches and more
What happens when one of your favorite records becomes warped? Do you shell out for a new copy, or put the oven on and try to correct it yourself? If you’re in the latter camp, Norman Records has assembled a guide to walk you step by step through heating up your record so that it can be flattened into a more amenable shape again. “Pure fear will put many people off this method,” they warn. “The pure effort involved will put off many more.”
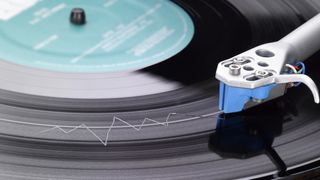
Similarly, they’ve also tackled the thorny subject of dealing with scratches on vinyl records. The methodology here is less involved (you won’t require your oven, which is a bonus) but it is fiddly. You’ll need a wooden toothpick, a magnifying glass, a clean anti-static microfiber cloth, and some patience. Firstly, identify the offending skip by playing the record.
Take a look with your magnifying glass and, using your toothpick, gently inspect for any bumps that shouldn’t be there. Clean away any loose debris with a cloth and drop the needle again. “Repeat the above steps until you're satisfied that you've fixed the issue or are simply wasting your life,” says Norman Records.

How to store vinyl records
This might seem simple – it’s just sticking an LP record on a shelf, right? – but don’t be fooled: how to store your vinyl records correctly is vital to maintaining the health of your collection. Stick to the basics: don't touch the surface of the record with your wandering digits, and use that anti-static brush before dropping the needle.
Once you’re done rocking the suburbs, remain vigilant. Brush the record again before returning it to its (preferably anti-static) sleeve and cover. A durable plastic sleeve would be your ideal next step (see below), before placing the LP back on a shelf that conforms to some largely common sense storage rules.
The first is regarding temperature – choose somewhere that’s 15°C to 25°C, avoiding any heat sources. Next, choose a shaded spot to avoid bleached sleeves and eventual warping. Stay away from surfaces that have vibrations from washing machines and speakers travelling through them, and don’t store vinyl records in a damp or humid environment as it’s bad for cardboard.
- Check out our cool vinyl record storage ideas for inspiration
Another factor to consider is pressure. “The aim is to keep your records upright with minimal force pressing against them, to prevent warping,” says Norman Records. So don’t stack your records flat, or on top of one another, and avoid packing them too tightly on the shelf. Also, separate 12s, 10s and 7s because, beyond aesthetic considerations, the added pressure on larger formats may cause them to warp to the shape of the smaller vinyl records.
Dividers can also have a role to play here, supporting the full face of each disc. “Remember that the shelves should have sturdy, immovable dividers every 4-6 inches and be able to support a weight of around 35 lbs per foot of shelf,” advises Norman Records.
Let’s now take a look at some of the best tools and kits for cleaning vinyl records…

